
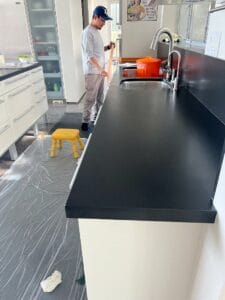
How to Properly Seal Marble Countertops
Gleaming marble countertops elevate kitchens and bathrooms into refined showplaces full of light and elegance.
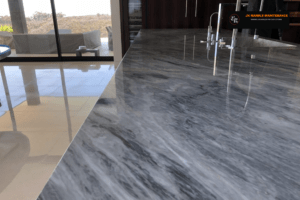
As natural stone, without protective sealing, marble remains vulnerable to etching, stains, and gradual erosion from regular use.
Learning proper sealing techniques forms the foundation for enjoying pristine marble countertops for their entire lifespan.
Follow this beginner’s guide outlining best practices for sealing maintenance.
Why Seal Marble Countertops?
The porous texture that permits intricate marble veining allows possible penetration damage if unsealed.
Sealant application fundamentally prevents such issues:
Stain Resistance – Blocks oil and water-based stains from absorbing into marble
Etching Protection – Defends against acids corroding calcite surface
Color Enrichment – Enhances innate marble tones and vibrancy. Easier Cleaning – Allows soap and liquids to wipe away versus penetrating.
Reapplying with enhancer sealers every 1-3 years ensures continual fortification as the longevity secret for interior marble use.
What’s Needed for Sealing Marble Countertops
Before starting, gather the necessary supplies:
- Sealant formulated for natural marble
- Paintbrush and foam applicator pad
- Microfiber cloths
- Tape for sectioning off areas
- pH-neutral cleaner
- Bucket of clean water
Quality sealants for calcite-based stones like marble will offer the best stain protection over general stone formulas.
Always test potential products first before wide application.
Step-By-Step Guide to Sealing Marble Countertops
Perform sealing in sections moving methodically across the marble tops:
- Spotless counter free of residues using a pH-balanced cleaner diluted in water. Rinse, then dry thoroughly.
- Tape off the section to be sealed first, allowing a 2-3 inch overlap between areas.
- Gently stir the sealant liquid before pouring a manageable amount into the roller tray. Dip the foam applicator lightly, then distribute it evenly across the section.
- Allow 10 minutes for penetration time, then thoroughly wipe off excess sealer using clean microfibers. No residue should remain visibly topical on the marble.
- Leave fully cured overnight before being exposed to use or liquids. Abrasion resistance maximizes after 72 hours.
- Repeat the process over the remaining sections until completely sealed.
Protecting Your Marble
One of marble’s few shortcomings includes potential vulnerability to damage from acidic substances that etch polished surfaces, abrasive scouring that erodes texture, or heavy point loads causing cracks.
While sealants provide a protective barrier, caution around routine kitchen and cleaning hazards preserves pristine marble for prolonged enjoyment.
Know what everyday items or ingredients pose risks, and then integrate preventative care.
The Acid Test – Citrus, Vinegar, and Wine
Acidic contents rank as public enemy number one regarding marble damage, especially food splatters going unnoticed.
Many common cooking ingredients fall highly acidic quickly etching calcite-based stones:
✘ Lemons/Limes and other citrus juices ✘ Vinegar for salad dressings or cleaning ✘ Tomatoes, ketchup, or salsa mixes
✘ Wine, alcohols
While quality sealants resist light acid exposure, persistent contact dissolves protective layers. Left disregarding too long, liquids seep into microscopic marble pores, causing irreversible dull spots and cuts.
Prevention Tips
- Immediately wipe and rinse spills
- Use trivets or mats under citrus fruits
- Designate separate cutting boards for acidic foods
Abrasive and Bladed Dangers
As acids chemically corrode marble, they can make physical abrasions across delicate surfaces.
Overzealous cleaning or scraping produces permanent divots and scrat,ches, and marring sleek finishes.
✘ Rough scrub pads or abrasive powder cleansers
✘ Scrapers for stuck residue removal ✘ Sharp knife points gouging material
Prevention Tips
- Use only soft cloths or gentle liquid cleansers
- Blot grime hen rinse instead of applying pressure
- Roll knives away from cutting motions over counters
table {
border-collapse: collapse;
width: 100%;
}
th, td {
text-align: left;
padding: 8px;
border: 1px solid #ddd;
}
th {
background-color: #f2f2f2;
}
| DO | DON’T |
|---|---|
| Use coasters and placemats to prevent stains | Subject marble to excessive weight |
| Use cutting boards to prevent scratches when chopping | Use harsh cleaners like bleach or ammonia |
| Seal marble countertops annually | Place toiletries directly on the counter |
How-To: Using Marble Poulticing to Remove Tough Stains
Poulticing represents one of the vital processes exalted art museum curators and stone care specialists employ to revive priceless works whenever previous cleanings fail, lifting stubborn stains and marring compelling canvases.
Harnessing absorbent clays or powdered mixtures to draw out stubborn marble stains, customized poulticing remedies target removal challenges.
Understanding best practices in poultice preparation, tailored layering techniques, and proper residue removal helps DIYers rescue their beloved marble artworks or surfaces once unyielding blotches appear seemingly immutable without invasive refinishing.
Selecting Appropriate Marble Poultice Mediums
Poultice selection depends first upon the offending stain type and suitable transfer medium:
Liquid Stains
- Ordinary liquid dish soap or detergent gel captures lingering dyes
- For oily residue, calcined clay or talc works well
Mineral Stains
- Iron oxide removal needs oxalic or acetic acid
- Hydrogen peroxide lifts embedded manganese
Organic Stains
- Enzyme digesters breakdown plant stains
- Sodium hypochlorite bleach targets the remaining organics
Pairing the suitable chemical solvents and absorbers ensures that lifted residues ultimately transfer into the poultice versus merely spreading issues broader.
Executing Proper Poulticing Procedure
With particular poultice ingredients assembled, careful site-specific layering prevents collateral damage:
- Map stained perimeter, then mix just enough paste to cover plus 1-2 inch margins
- Spread poultice layer roughly 1⁄4 inch thickness, avoiding excess pooling
- Allow required reactant-working duration before gentle removal
- Rinse residues away without scattering remnants, then neutralize surface chemistry
Once lifting efficacy reaches limits through repeated applications without improvement, pursue alternative stain extraction approaches before pivoting towards re-polishing methods addressing immovable discoloration.
While initially intimidating, methodical poulticing practice removes the most unwilling marble stains if avoiding rushed, overzealous attempts—patience and correctly matching solvent chemistry and absorbents gift gorgeous renewed stone.
Always contact care experts addressing any unknown, stubborn stains threatening prized marble worktops, sculptures, or surfaces.